

SSDT or SQL Server Data Tools is a tool that can be use to create a DW (Data Warehouse). In this post we will learn how to install for use it in the future.
In case that the link of this post have change, you can check Microsoft’s documentations for the SSDT and SSMS ( SQL Server Management Studio).
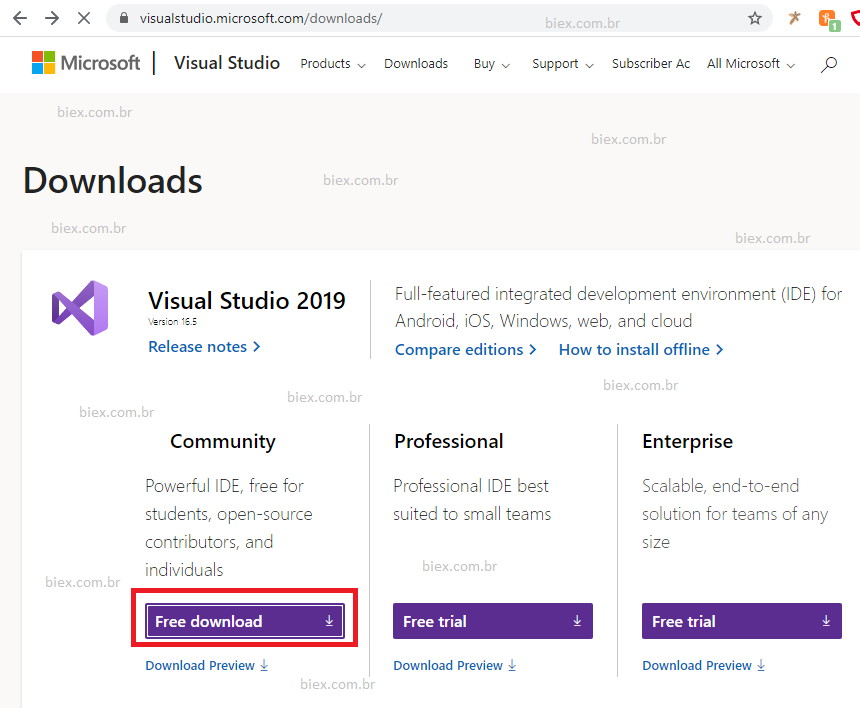
- Download the Visual Studio using this link and selecting “Community”.
- Execute the download program and continue thought out the screens until get on the screen bellow:
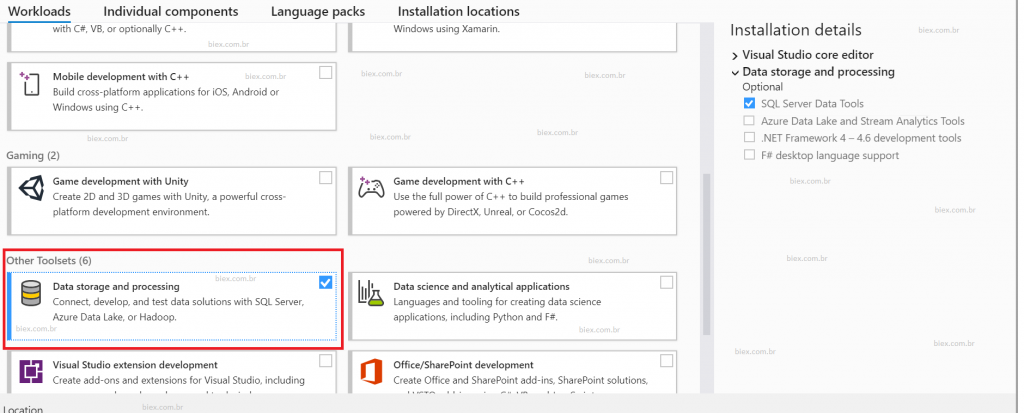
- In this screen we will mark at least on the category “Other Toolsets”, and option “Data storage and provessing” the box “SQL Server Data Tools”. And hit Install.
- After conclude the download and the install, you will need to restart Windows.
- With te OS booted, open the Visual Studio and make login with a Microsoft account. If you don’t have an account create one here. After open the VS, close the program.
- To complete the SSDT’s configuration let’s install the folow add-ins:
- Required, download and install:
- Optional, download and install:
- Now that the SSDT is install, let’s move on to the SSMS, that can be download using this link.
- After install, we can open the program and the first screen will be the “Connect to Server”. Since our project are local tests we will always use the local Server, in this screen you will see your own Local Server. And the first access will be done using Windows Authentication.
- After connected we recommend create an user name ‘sa’ with full access. This can be done in the left menu, in your server, security, Logons, Right Click > New Logon. Marking “SQL Server Authentication”, defining a password and allow all securables.
Well, as you can see the install is astonish simple. I make this post to easy the path for the aspiring data scientists.